About Me

My photo
I love crafting, especially rubber stamping. Most weekends I can be found surrounded by paper, rubber stamps and ink.
Showing posts with label Spring Card Camp 2020 cards. Show all posts

Friday, May 1, 2020

On Line Spring Card Camp Day 16 Cards

Happy Friday Peeps,

I'm slowly getting more cards made for the Spring Card Camp. I'm a little slow fitting them in with work, but boy have I been enjoying all of the techniques. Seems funny that after stamping as long as I've been, that there are techniques that I don't know, or at least better ways to do something I do know.

Today I have card examples for Day 16, taught by one of my coloring heros, Kathy Racoosin. The technique that she taught simply blew me away with the finished product, even mine, LOL. The class is to color a large image or images using Copic, or other alcohol markers, and get two cards in one by layering two panels together then coloring only the top one. The secret is the type of paper used on the top. Also, for the panel that is actually colored, you turn it over and use the "wrong" side to make the card.

I loved this process so much that I made 3 sets of cards. Two sets are stamped with Altenew stamp sets and the third is stamped with a Simon Says Stamp set. I followed Kathy's instructions and couldn't be happier. In fact, I think this is my favorite of the classes from the Camp.

Below is the first set that I made. The stamp set is the Altenew Wallpaper Art set. The images have a fair amount of black solid parts and for this technique, I colored over these areas with a black 110 marker. The other Copic colors are R56, R59 and R35 for the flowers and G29 for the leaves. For the background I used BV29 and then used a nubby towel with colorless blender to blot away some of the color and help promote the bleeding through to the second panel.

I'm posting this pair to this week's Color Throwdown Challenge.


Here is the set of cards made using the Altenew Spring Daisy stamp set.


And this set of cards is made using the Simon Says Stamp Sketched Flowers set.


I kind of had a hard time figuring how I wanted to add the sentiments and what to do for embellishments because I didn't want to cover anything up. I tried to keep it all simple.

I have 4 or 5 more classes that I haven't made cards for yet. I've watched all of the videos, and I'm thinking of what stamp sets I want to use.

Thanks to Kathy for teaching such a fun, and a very interesting process.
Thanks to you for looking in. Have a wonderful weekend!
Colleen

Supplies
Stamps: Altenew sets Wallpaper Art and Spring Daisy, Simon Says Stamp set Sketched Flowers
for the main images. Other Altenew, Gina K, Concord & 9th, and Avery Elle sets for the greetings
Paper: Office Depot envelopes, Neenah Solar White,  Simon Says Stamp heavy card stock in various colors
Ink: Memento tuxedo black, Copics, Gina K orange, VersaMark
Other: Misti, Gemini Jr, C&9th dies, Altenew die, misc glass beads and sequins

Friday, April 24, 2020

Spring Card Camp Day 10 Projects

Happy Friday afternoon peeps,

I was on a roll yesterday evening making cards. I made four cards! Two of them are for Day 10's project for the Spring Card Camp 2020.

This class was taught by Lydia Fiedler. She showed us how to use sparkly paste with stencils. I just happen to have 5 new tubs of the Rena K Designs Electro pop glitz.  One of the cards is made with a large circle cut into a piece of card stock with a circle die and the other is made using a Rena K stencil.


Aren't these fun and bright. The flower card is made with a Rena K stencil and a Rena K stamp and dies set. The inks are also Rena K electro pop inks. The kitty cat card is made with Paper Smooches stamps and dies.

Using a craft palette knife, I smoothed a fairly thin layer of the glitter gel over the stencils. After they were throughly dry, I trimmed the panels for the card layouts, then added the stamped and die cut images. The flowers have bright yellow enamel dots for the centers. I choose to leave a sentiment off the front and just go with one one the inside. The images are all from the same Rena K stamp set.


Here is the inside of the kitty card.


I'll be back with a couple more cards that I made last night later.

Thanks for stopping in,
Colleen

Supplies
Stamps: Sending Sunshine set by Rena K and Nine Lives set by Paper Smooches
Paper: SU Pink Passion  and Whisper White card stock, Taylored Expressions light pink textured card stock
Ink: Rena K Electro pop inks, Memento tuxedo black, Copics
Other: Rena K stencil, Rena K Poppin Pink Glitz gel, Rena K and Paper Smooches corresponding dies, Spellbinders circle die, enamel dots, Misti, Gemini Jr, Diemensionals

Wednesday, April 22, 2020

Sending Sunshine and Rainbows

Hi,

I'm back with Day 11 cards for the Spring Card Camp. This class was taught by Dawn Waleslagle and it's all about making rainbows using nesting circle dies. Another super fun class!

Here are my two cards.


Using the Die-namics inside and out stitched circle dies, I taped them together as Dawn showed us to do, then cut them from Neenah Solar White card stock. On the brighter rainbow, I used TE blending brushes and TE ink cubes in bright red, yellow, green, blue and purple to color the individual circles. The colored circles are glued onto a plain white circle cut using the largest die. This is cut in half to make two rainbows. The background on this card is stamped with the Concord & 9th Sunshine Turnabout stamp. The clouds are made using a C&9th die and the unicorn and greeting are from Ellen Hutson sets.

For the lighter rainbow, I used pastel shades of Copics to color the circles. The cloud dies are Lawn Fawn and the unicorn is from the Ellen Hutson set. The sun stamp is from C&9th.

On both cards, I brushed a very liberal amount of Wink of Stella clear glitter over the rainbows.

I'm really enjoying these classes!

Thanks for stopping in,
Colleen

Supplies
Stamps: Unicorns and Rainbows and Pure Magic sets by Ellen Hutson, Brighter Days set by Concord & 9th
Paper: Neenah Solar White, SU Basic Black
Ink: TE ink cubes, SU Pineapple Punch and Mango Melody, Memento tuxedo black, Copics
Other: Die-namics Inside and Out Stitched Circle dies, Concord &9th Brighter Days cloud die, Ellen Hutson Unicorns and Rainbows dies, Lawn Fawn cloud border die, Misti, Gemini Jr, TE blender brushes, Wink of Stella, Dimensionals, liquid glue

HBD

Hello and happy Hump Day,

I had to go out to see a hospital customer today so I'm late getting some more post done for cards I've made over the last few days for the Spring Card Camp. I've been skipping around since I'm about 4 days behind, but that's okay. I'll eventually do all of the techniques.

This post has Day 8 cards. The teacher was Kathy Zielske, and the lesson was to make a shaker card with  a word die, and then use the negative cutout to make a second card. I looked through all my dies and the ones that are words are very small and I didn't think they would work for the shaker. What to do? I used alphabet dies and a couple of rectangle dies instead and it worked pretty well.

The front of both cards are inked with Hero Arts birthday stencils with Distress Oxide inks. These were super fun to make.


Kathy used watercolor paper and brushed Distress Ink in 4 colors over an area to cover the die being used, so that is what I did. After drying the panel with a heat tool, I cut it out with the stitched rectangle die. Then I centered the three letters and cut them out. After putting the shaker elements together, I cut a slightly larger rectangle from the card front then glued the shaker in place. The cutout letters are used on the second card. Love how colorful these turned out.

Thanks for stopping in,
Colleen

Supplies
Stamps: Hero Arts Party set and Hero stencils
Paper: TE bright yellow and green card stock, Neenah Solar white card stock, Bristol watercolor paper
Ink: Distress and Distress Oxide inks, Memento tuxedo black
Other: Die-namics lower case alphabet  and Stitched Rectangle dies, Misti, Gemini Jr, water brush, enamel dots, foam tape, sequins for shaker
Monday, April 20, 2020

Shell-abrate Your Inner Mermaid


Hi peeps,

A quick post for the cards I made for Day 9 of the Spring Card Camp 2020. This class was taught by Channin Pelletier and it was all about using stencils and Distress Oxide inks to get two card panels.

I used a Gina K stencil to make my cards. The second, watercolor panel turned out rather light, but still usable as a background for this mermaid tail stamped image from Ellen Hutson.

Both cards use the same focal image, with different sentiments on the outside of the card. On the watercolor panel card, the sentiment is heat embossed with white EP. On the ink blended card, the sentiment is stamped on velum with black ink. I did use that little trick that Channin showed, sandwiching the velum between extra die cuts. I will definitely be using that more often. To finish the cards, I added some clear glass beads to the ink blended panel and some sequins to the watercolor panel.


Here is the inside sentiment, used for both cards.


This was a fun technique to learn. I think I may give it another go.
Thanks for looking,
Colleen

Supplies
Stamps: Inner Meremaid set by Julie Ebersole for Ellen Hutson
Paper: SU Whisper White and Coastal Cabana card stock, Bristol watercolor paper, Vellum card stock
Ink: Distress Oxide ink in various blue shades, VersaMark, Memento tuxedo black, Zig Real Brush water color markers
Other: Gina K Water Droplets stencil, Inner Mermaid set dies, Die-namics Rounded Corner Stitched Rectangle die, clear glass beads, blue sequins, Misti, Gemini Jr, liquid glue, ink blending tool, white embossing powder, heat tool

Wednesday, April 15, 2020

Simply Brew-tiful

Hi Peeps and Happy Hump Day,

I have a card to share today for Jaydee's color challenge for this week's Paper Players challenge. The colors are So Saffron, Seaside Spray and Gray Granite as the "neutral." I've chosen to use brown as a neutral shade for my card.

I've been taking the 2020 Spring Card Camp classes and this card is one that I made for Day four's class. To see the post for day four, click here.


The coffee cup is colored with Polychromos colored pencils using yellow and blue shades. I used a sweet piece of patterned paper for a table cloth and the sentiment is stamped in Memento black ink.

Here is the inside of this card.


A fairly CAS card. I'm having so much fun with the classes. If you have time, I recommend them and you can start any time as they are all via video.

Thanks for looking in,
Colleen

Supplies
Stamps: Latte Love set by Lil Inkers and Be A Barista by Reverse Confetti
Paper: Neenah Solar White and Simple Stories Spring Farm House patterned paper
Ink: Memento tuxedo black, Hero Cup O Joe, Polychromos colored pencils
Other: Lil Inker set dies, Misti, Gemini Jr, Dimensionals

2020 Spring Card Camp Day 4 Projects

Hi all,

After getting home from work yesterday afternoon, I sat down to watch the day 4 class video and make my projects. These looked to be fairly quick and simple, and fun to make. The class was hosted by Julie Ebersole, one of my favorite card makers.

I made four cards, two using the technique that Julie was teaching and two using the extra die cut piece. Coloring on all images was done using Polychromos colored pencils.

Here are pictures of the two pairs of cards.

Set number 1 is coffee themed:


Set number 2 is kitty themed:


The steps to make the first card is to stamp an image that has a corresponding die onto the front of the card, then cut out the image with the die. Re-stamp the image though the die shape onto the inside of the card. Open the card, cut a mask for the image and stamp more images around the masked image. Color them up and finish the card. Use the first die cut image to make a second card.

On each of my pairs above, the cards with the Baker's twine are the first cards with the die cut front.
Here are the insides of each of those cards.


I'm having so much fun participating in these classes and now I'm looking forward to Day 5!

Thanks for looking and have a great day,
Colleen

Supplies
Stamps: Latte Love set by Lil' Inkers and Frisky Felines by Gina K
Paper: Neenah Solar White card stock
Ink: Memento tuxedo black, Hero Cup O Joe, Polychromos colored pencils
Other: Misti, dies from the above stamp sets, Gemini Jr, Baker's twine

Tuesday, April 14, 2020

2020 Spring Card Camp Day 3 Project

Hi all,

Day three's project for the Spring Card Camp, brought to us by Yana Smakula, is all about cutting up a background stamped image to "color with paper." The idea is to take a fairly abstract background stamp, stamp it on multiple sheets of different colored card stock, then cut out pieces to make a background for your card. My large background stamp supply is extremely limited, especially one that would work for this technique. The best I could come up with is Hero Arts stamp called Abstract Waves. In Yana's instructional video, she used the background to make the sky, hills, rivers and a lake for a little village. I used mine to do a similar scene. The houses and trees are from Concord & 9th.


Below is the completed card with the background stamp. I have a box of retired SU card stock colors and I thought this would be a good project to use some of the up. I used various blues and purples for the sky, then some browns, rust and golds for the mid area and finally greens for the grass. The houses and trees are stamped with Memento and colored with Copics and cut out using the set dies. I thought  a black card base would look good and I used black with white embossing for the sentiment.


For the inside of my card, I've used other images from the same Concord & 9th set.


This was a very long process, maybe because the background stamp I used has so many little swirls. I'm not sure I'd really do this again, LOL, but I really like learning the concept. I sure wouldn't have thought to do this, although it is similar to paper piecing on smaller images instead of coloring.

Looking forward to doing day four's project. But first, I actually have to go visit a customer and do some staff training, so my stamping will have to wait until later this afternoon.

Thanks for looking in,
Colleen

Supplies
Stamps: Abstract Wave background and Layering Sea and Sky sets by Hero Arts and City Stacks by Concord & 9th
Paper: Various retired SU card stock, Basic Black and Whisper White card stock
Ink: Gina K Amalgam black ink, Memento tuxedo black, Copics, VersaMark, Hero blue ink cubes
Other: Misti, liquid glue, Concord & 9th dies, Hero Sea and Sky dies (clouds), white EP, heat tool, Gemini Jr, Dimensionals

Monday, April 13, 2020

2020 Spring Card Camp Day 2 Projects

Good morning to all,

Monday again. My week looks to be mostly hanging out a home and practicing "social distancing." I'll have a few on-line training classes to do for work, but no plans to have to go out and about. That could change, but for now, I am staying put.

I have my Day 2 projects for the Spring Card Class 2020. So far, I'm having fun learning some new techniques, or at least ways to use stamps and ink in non-traditional ways. Day two's class was presented by Christina Werner and the technique was ink blending on the stamp using Distress Oxide Inks. A little time consuming maybe, but I like to play.

I used some Gina K stamps, Neenah Desert Storm card stock and Distress Oxide inks in a large variety of colors to make my two cards. The idea is to use a half sheet of card stock, mark the center and stamp the images so that you end up with two card fronts by cutting the sheet in half once the stamping is completed.


The larger flower and leaf images are ink blended. I used some smaller images from the set to fill in some areas. These are stamped using just one color of ink as they are too small to do the technique.

Here are the individual cards fronts and insides.

Card 1:


Card 2:


I'm looking forward to Day Three. Luckily, I have time to play.
Thanks for looking,
Colleen

Supplies
Stamps: Gina K sets Embroidered Flowers, A Big Hello, and Just Because
Paper: Neenah Desert Storm
Ink: Distress Oxide Ink
Other: Misti, Die-namics Wonky Stitched Rectangle die, SU Stitched Rectangle die, Hero Infinity Curved Rectangle die, enamel shapes, foam tape, Gemini Jr

Sunday, April 12, 2020

Spring Card Camp 2020 Day 1 Cards

Happy Easter Sunday,

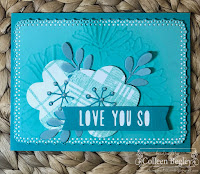
I signed up for the Spring Card Camp 2020 and yesterday was the first class taught by Jennifer McGuire. She taught us how to make a faux embossing folder using heat embossing. I decided to try using a large outline flower stamp from Concord and 9th to make my projects. In my post today are the 4 panels that I made following Jennifer's instructions and then my finished cards. I was able to get the panels completed yesterday and the completed cards finished today.

Here is a picture of the four panels. The heat embossed panel that was used as my faux embossing folder is the panel in the lower right with the white EP.


After running the other three panels through my Gemini Jr using the sandwich for embossing with dies, I used a sponge ink blending tool to blend a slightly darker ink than the card stock over the embossed area. This helps the image pop. On the pink and purple panels I'm using the recessed side and on the blue, the raised side.

Here are pictures of the four finished cards, first together then individually.


Front and inside of the purple card.


Front and inside of the blue card.


Front and inside of pink card. The sketch for this card comes from the current Sunday Stamps Challenge.


Front and inside of heat embossed card.


This was a super fun technique to learn and an interesting way to stretch our stamps to use as backgrounds. 

Class #2 is being taught by Kristina Werner. I've watched the video and I plan to do my stamping later this evening.

Thanks for stopping in, and have a good Sunday evening,
Colleen

Supplies
Fine Line Florals by Concord & 9th for the embossed images
email me if you would like to know the other specific supplies used to make my cards